

Some people bring a bottle of wine when they come to visit. My friend Bonnie Lynn Rowe brought two wooden signs she’d painted by hand — and then told me they were for the chickens. Not for me. For the chickens. I have never been so thoroughly put in my place by a houseguest, and I loved every second of it.
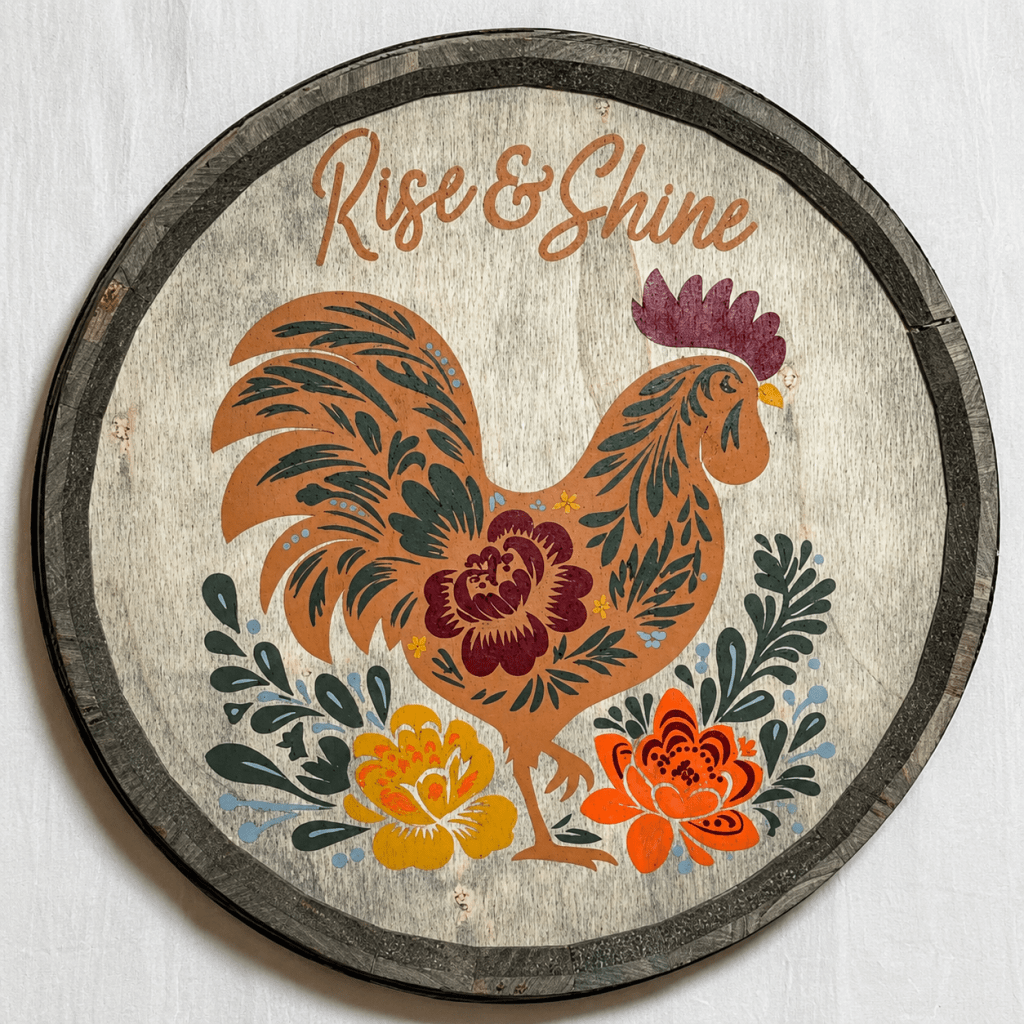
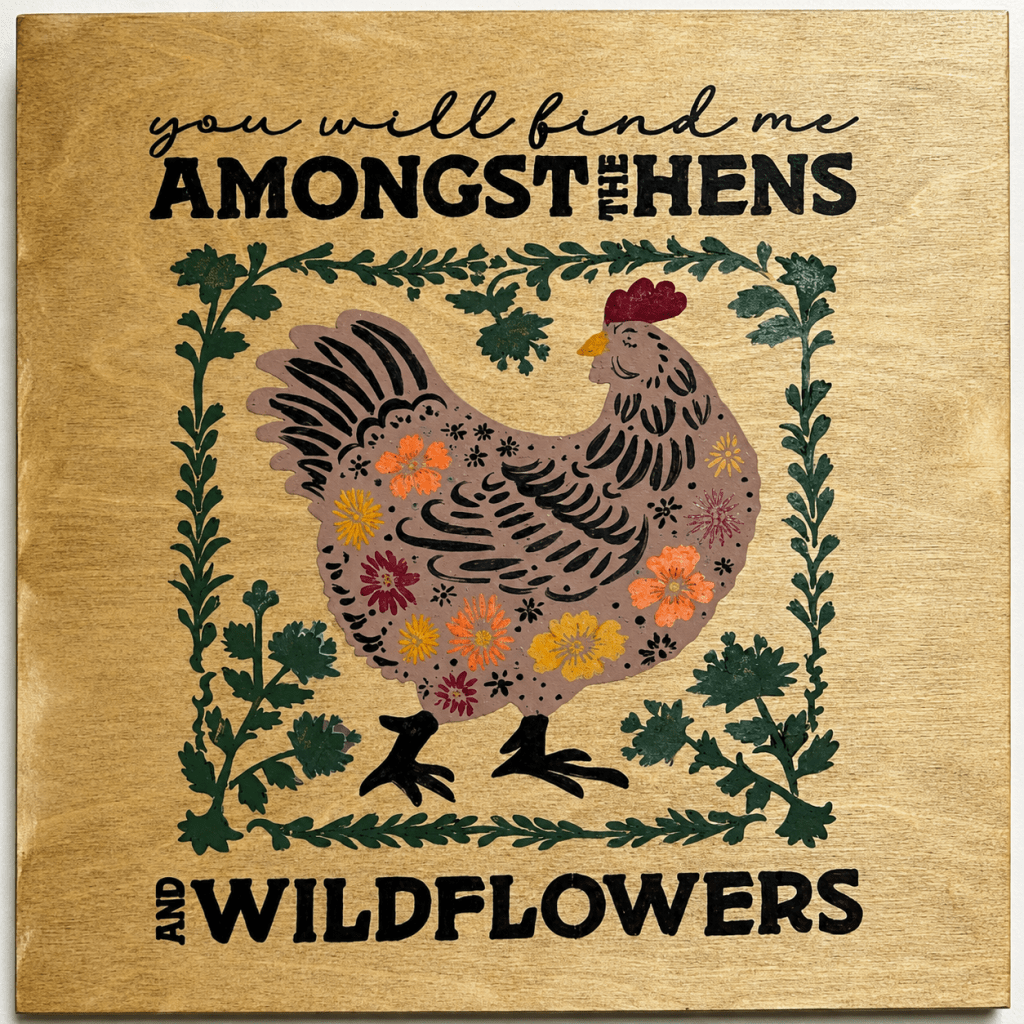
Bonnie has a good eye and far more patience than I’ll ever have, and she’d been quietly working on these for a couple of weeks as a surprise for the coop. One is a round “Rise & Shine” rooster, painted on an old barrel head with a weathered gray band around the rim. The other is a square “you will find me amongst the hens and wildflowers” hen, wrapped in a leafy green vine border. Both are done in that folk-art style — the kind with tail feathers that curl like brushstrokes and flowers tucked into every spare inch.
So naturally I made her sit at my workbench with a strawberry lemonade and walk me through exactly how she did it.
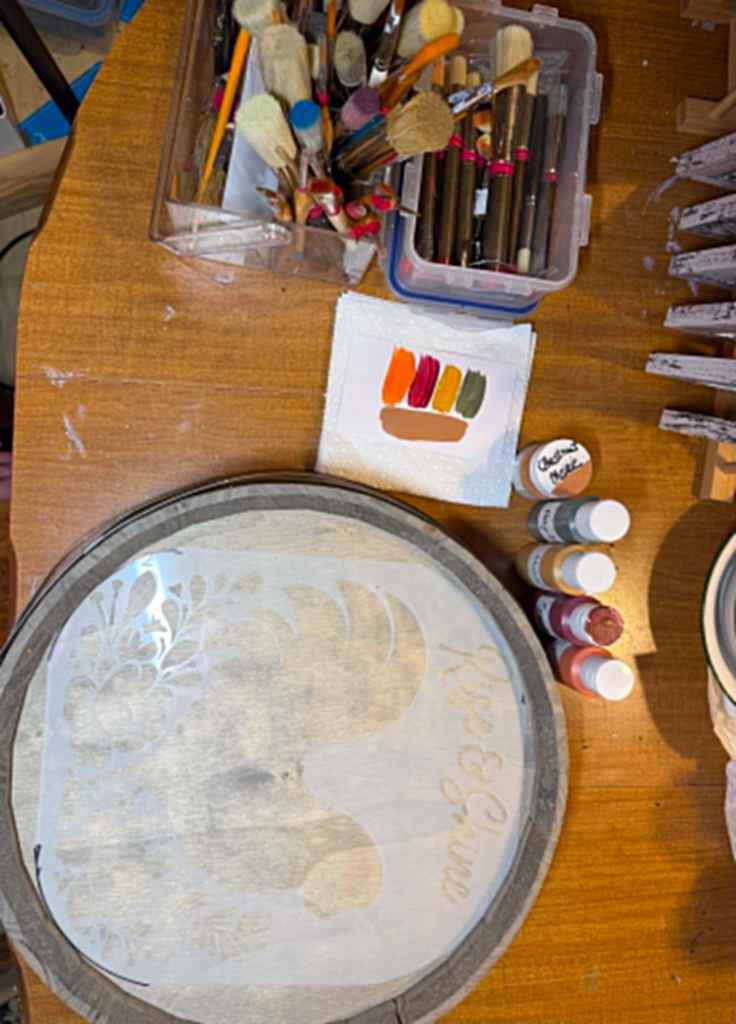
She started with the surface
Bonnie is a scavenger. The rooster lives on a salvaged barrel head she’d been hoarding for a project; the hen sits on a plain square wood plaque. Both got a light sanding and a wipe-down first — she says paint grabs better on a surface that’s been knocked smooth, and I’m not about to argue with results like these.
Two layers, taped down tight
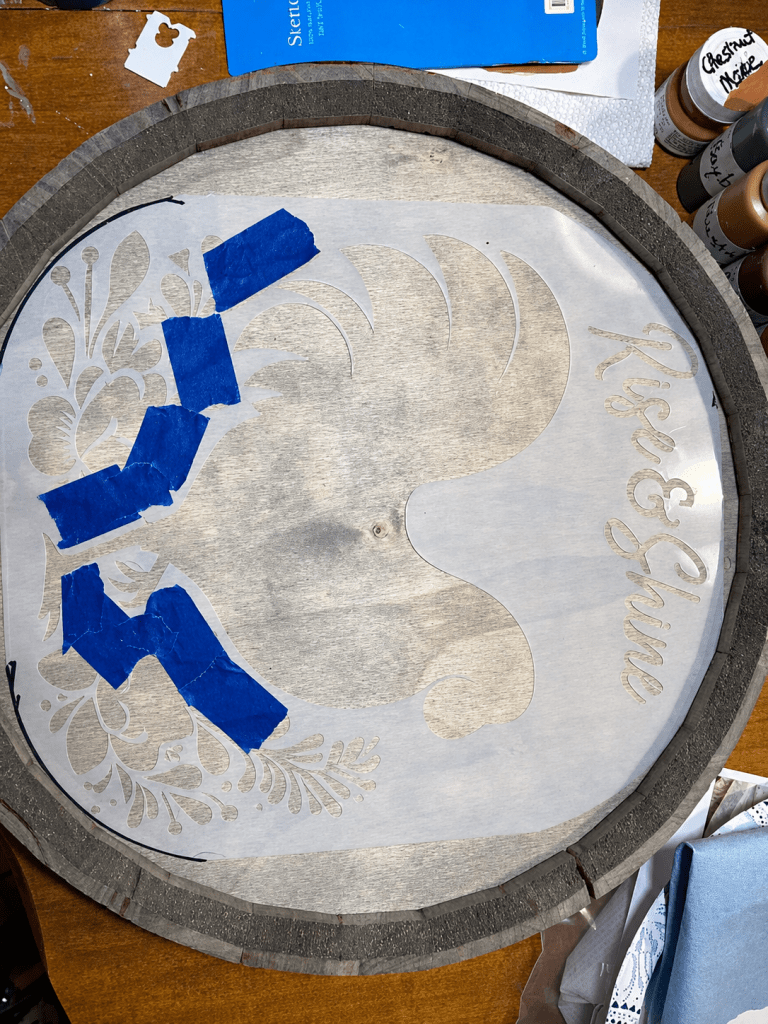
Here’s the part I didn’t know going in: both of her designs are two-layer stencils. The first layer holds all the shapes — the bird, the blooms, the leaves. The second layer drops the fine detail on top: the black feather lines and the little dots and dashes that make a flat shape suddenly look like a real rooster.
The whole game, she told me, is registration — lining the stencil up exactly and taping it down so it can’t budge. She uses blue painter’s tape, a lot of it, and presses every edge flat. If the stencil lifts even a hair, paint creeps under it, and you spend your evening cleaning up fuzzy edges instead of admiring your work.
Base colors first, light to dark
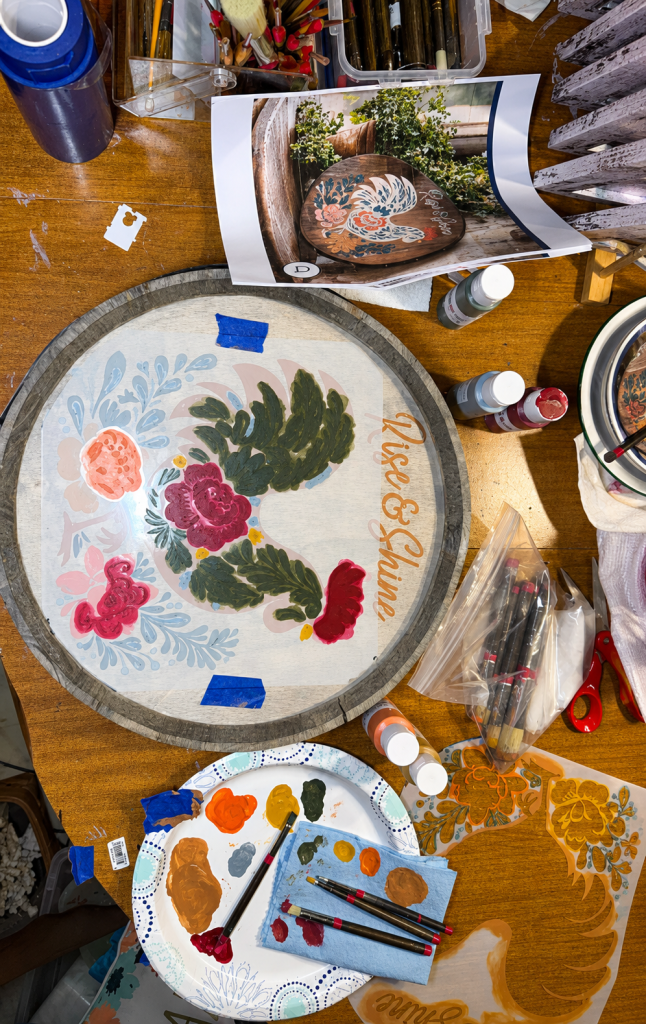
With the first layer taped down, she blocked in the big shapes. The rooster’s body went on in a warm chestnut; the hen in a soft, dusty mauve. Then the flowers — golds, oranges, corals, a deep berry red — and the greens for the leaves and that vine border.
She works light to dark, the way she does everything, building color up in thin coats and saving the darkest shades for the centers and shadows. She kept a printed photo of the finished design propped beside her the entire time, just to keep her colors honest. No shame in a reference, she says. The pros all use one.
Then the detail layer brings it to life
Once the base was dry, she laid down the second stencil and added the fine work — the black feathers sweeping across the rooster’s tail, the seed-dot centers in the flowers, the lettering. This is the layer that does the magic. One minute it’s a pretty terracotta blob; you peel the stencil back and suddenly there’s a whole rooster looking at you like he runs the place.
A few white highlights and pale-blue accent dots to finish, a coat of clear sealer so the coop damp won’t touch them, and she was done.
The hens were unimpressed. The humans were not.
I hung the two of them side by side on the hen house wall, and I’ll be honest — the actual chickens did not look up. Phyllis gave the rooster one suspicious glance and went straight back to screaming about nothing in particular. But every two-legged visitor since has stopped dead and asked where I got them, which is precisely the reaction Bonnie was after.
If you’d like to make your own, she used the Rise & Shine floral rooster stencil and the “amongst the hens and wildflowers” floral chicken stencil — both reusable, so she’s already threatening to paint a whole matching set for her own coop.
It’s the best kind of gift: something a friend made with her own two hands, hung in the one place on this farm where I spend more time than I do in the house. The chickens still don’t appreciate it. That’s all right. I appreciate it enough for all of them.
— Pearl

Leave a comment