
There’s a blue tote in the back corner of my greenhouse that I try not to brag about, because the residents do all the work and I just take the credit. It’s my worm bin, and starting it was easily the laziest, most rewarding thing I’ve done out here all season.
I’d been meaning to try vermicomposting — composting with worms — for years. Every time I cleaned out a bed, I’d haul an armload of spent plants and trimmings off to the pile and think, there has to be a better use for this. Turns out there is, and it eats faster than I do.

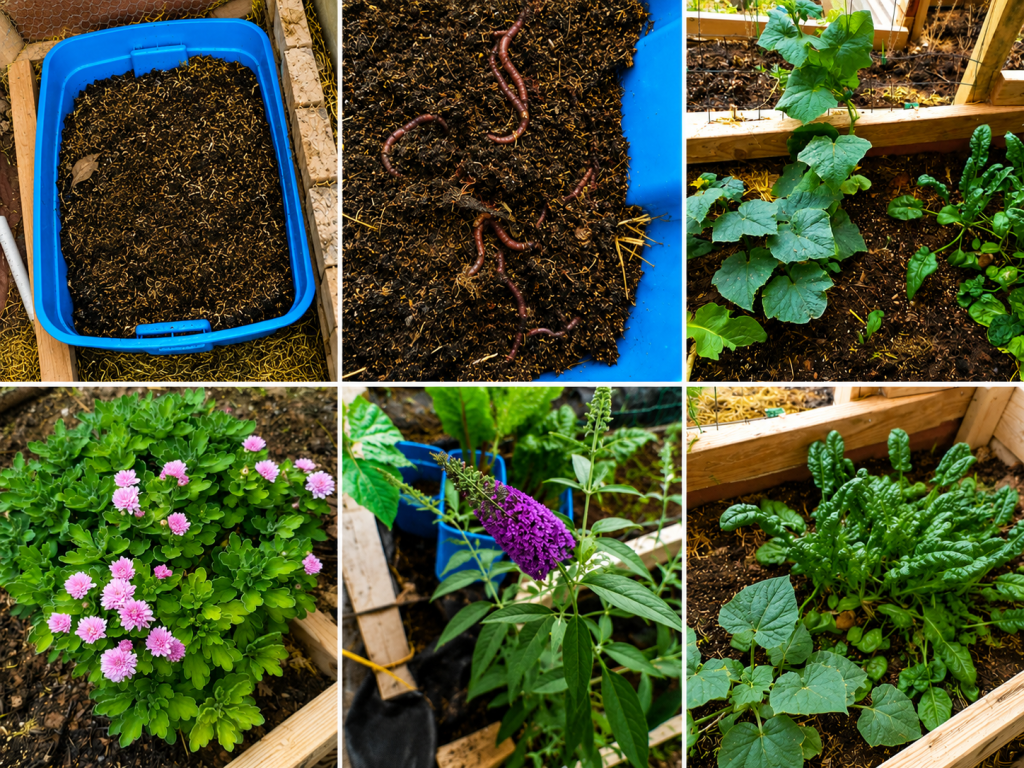
Why bother with worms
Worms turn garden and kitchen scraps into castings, which is the polite word for worm manure and the reason gardeners call the stuff black gold. It’s a dark, crumbly, nutrient-rich compost that goes straight back into the beds. A handful worked into the soil around my cucumbers did more than any bag of fertilizer I’ve bought — and it came from things I was already throwing away.
Where I got my worms
I ordered European Nightcrawlers from Utah Worm Company, a family-run worm farm right here in Utah. I expected a faceless box to show up on the porch; instead, Calvin called me personally to sort out the shipping, which is not a sentence I get to write about most things I buy online. The worms arrived lively and got to work within a day.
There’s a bonus I didn’t plan on, too: European Nightcrawlers double as fishing bait. So when someone around here gets the itch to head to the lake, a scoop from the bin sends them off with a cup of worms. A compost pile you can fish out of — I’ll take it.
A word of caution, learned the hard way: not every nightcrawler is a composter. I also picked up a batch of their Canadian Nightcrawlers, figuring more worms meant more compost. Those turned out to be earthmovers — soil-builders you work directly into the ground, not bin worms. They went out to the raised beds, where they’re perfectly content, and the Europeans kept the bin.
The setup couldn’t be simpler
The whole thing is a plastic tote with a few holes drilled in for air. I lined it with shredded cardboard for bedding, dampened it until it felt like a wrung-out sponge, and tucked it into the shadiest back corner of the greenhouse. That spot matters more than the bin does — worms want cool, dark, and damp, and the back of the greenhouse keeps them out of the sun and steady through a Utah temperature swing. I followed along with a simple DIY video when I built it, and it really is a one-afternoon job.
What I feed it
Garden scraps, mostly — trimmings, spent greens, the odds and ends I used to cart off to the pile. I add a layer when I have it, keep the bedding moist, and otherwise leave them alone. That last part is the trick. Worms do their best work when you stop fussing over them, which makes them my favorite livestock on the place. The hens should take notes.
A few months in, the bottom of the bin has turned into exactly the dark, earthy castings I was promised. I scoop a little out, mix it into the beds, and the whole thing loops back on itself: scraps go in, black gold comes out, the garden grows, and I haul a fresh armload of trimmings back to the bin.
If you’ve been on the fence about it, consider this your sign. Start small, start lazy, and let the worms make you look good.
— Pearl

Leave a comment