
A few weeks back I showed you the two folk-art chicken signs my friend Bonnie painted for my hen house, and ever since, the same question keeps landing in my comments and my kitchen: okay, but how do you actually DO that?
Well. Today I get to answer it properly, because Rosa Picon — a talented crafter who works with the same stencils Bonnie used — sent over her process photos of the very same “you will find me amongst the hens and wildflowers” design, from bare board to finished sign. Rosa did hers in navy and white, and I’m not saying I like it better than mine, but I’m not not saying it either.
So pour yourself something cold and let’s walk through it, step by step, with Rosa’s photos doing the heavy lifting.
First, understand the trick: it’s two stencils, not one
This design is a two-layer stencil. Layer one carries the shapes — the solid hen silhouette, the lettering, the wildflower vine border. Layer two carries the detail — all those curling feathers and folk-art flowers that live inside the hen. You paint the first layer, let it dry, lay the second layer on top, and paint again. The layers are cut to line up with each other, which means the intricate part is handled for you. No freehand required. No art degree required. I checked.
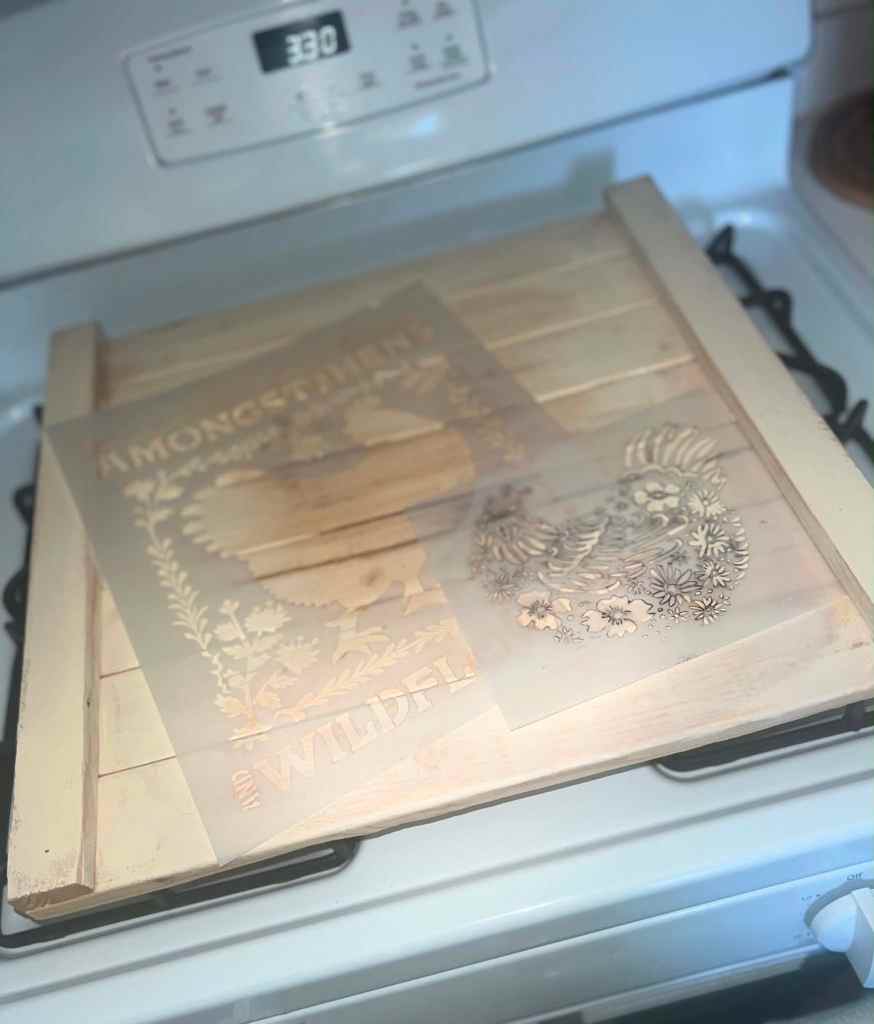
What Rosa used
- A plank-style wood board (hers has side rails, shiplap-style — very farmhouse)
- The two-layer hen stencil (link at the bottom, same one Bonnie used)
- Acrylic or chalk paint in white and navy
- A stencil brush or foam sponge
- Blue painter’s tape — more than you think you need
- Paper towels for offloading
- Clear sealer if it’s headed somewhere damp (like, say, a hen house)
Step 1: Tape down layer one like it owes you money
Rosa started with a light neutral base coat on her board, then taped the first stencil layer down flat — every edge pressed tight. This is the same lesson Bonnie preached at my workbench: if the stencil lifts even a hair, paint sneaks underneath and your crisp lines go fuzzy.
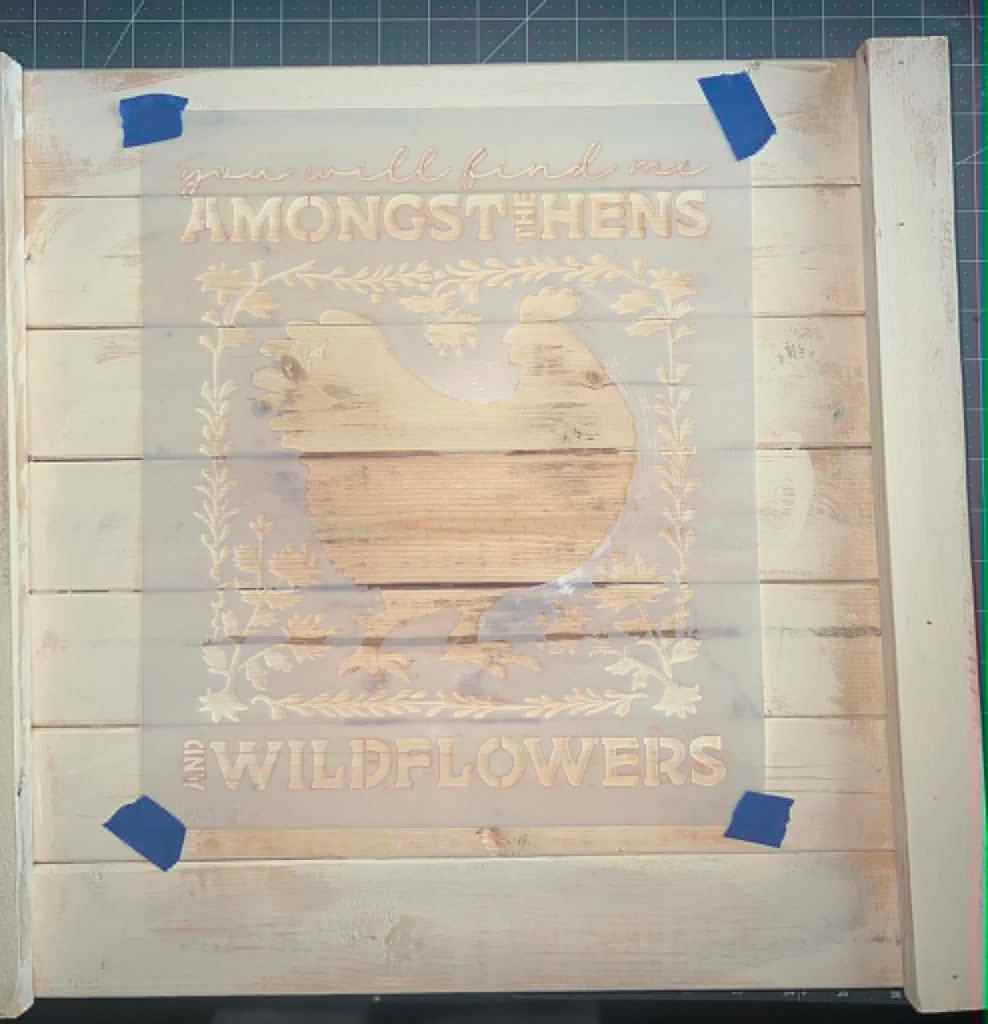
Step 2: Border and lettering first
With everything secured, Rosa worked the vine border in navy and the lettering in white. Her brush was nearly dry the whole time — dip, then dab the excess off on a paper towel until you’re sure there’s no paint left, then dab some more. That’s called offloading, and it is the entire secret to stenciling. Thin, nearly-dry layers. Impatience is how bleeding happens.
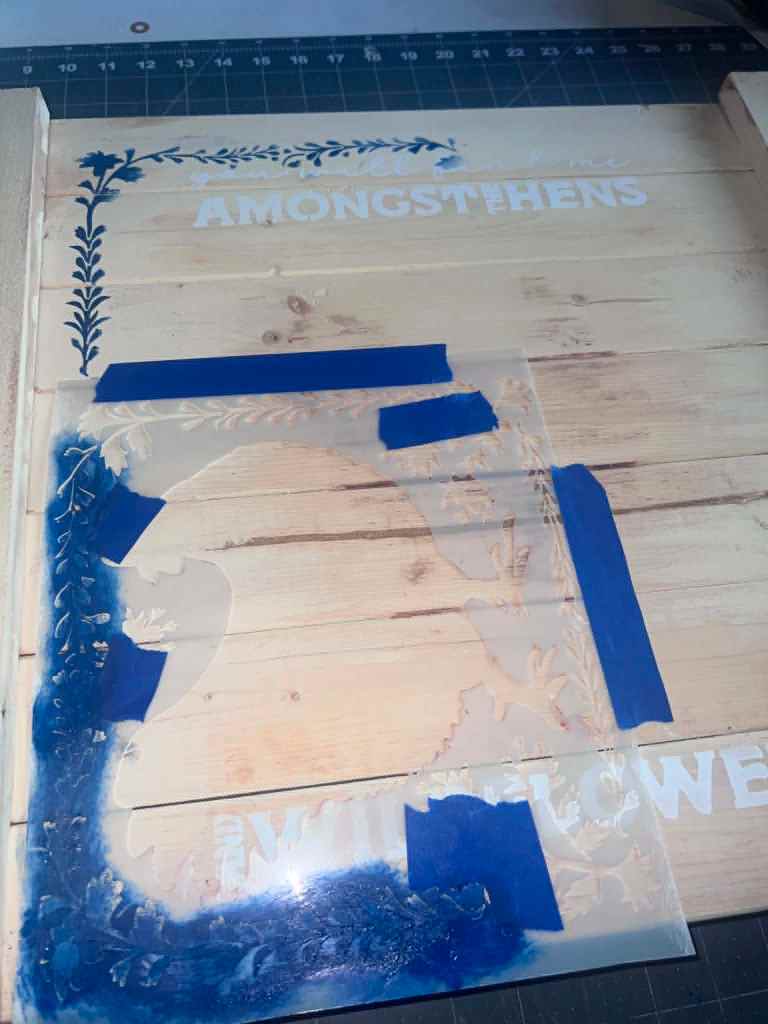
Step 3: Paint the hen — the whole hen — in white
Next, Rosa masked off the surrounding design with painter’s tape and filled in the full hen silhouette in white, building up thin coats.

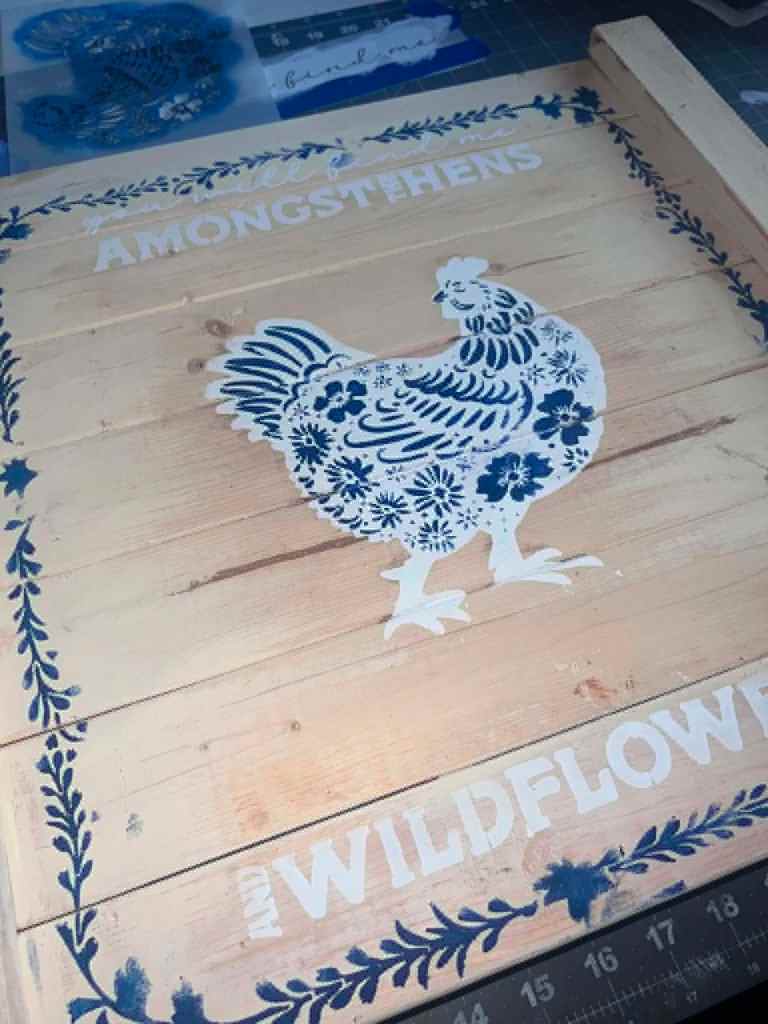
Peel the stencil back and you’ve got a clean white hen just standing there, waiting for her feathers.
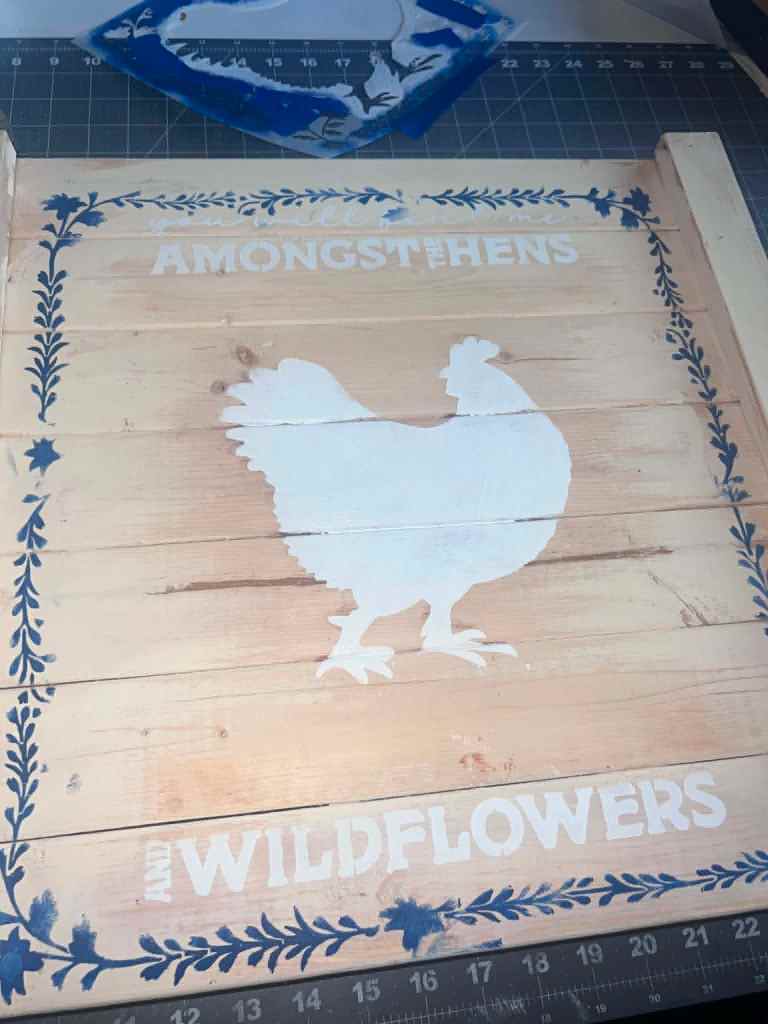
Step 4: Layer two — where the magic happens
Once the white was bone dry, Rosa positioned the detail layer over the silhouette. Take your time here; the detail is designed to nest right inside the base shape, so slow and careful lining-up pays off.

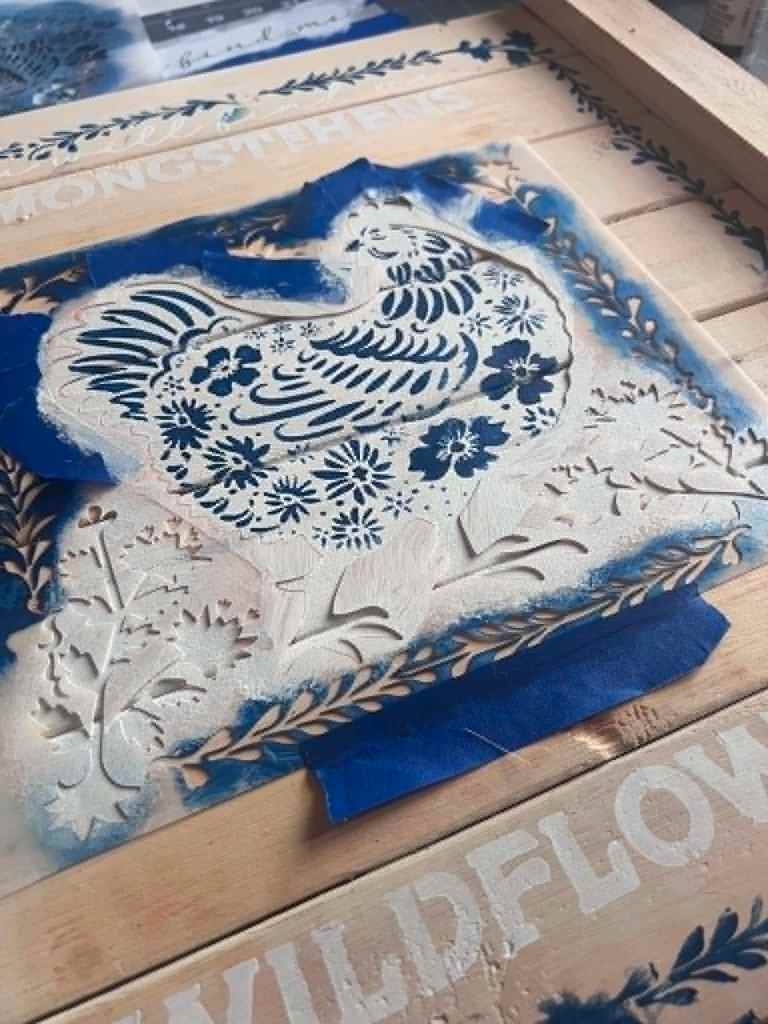
Then navy paint, same nearly-dry dabbing, straight through the detail layer. Mid-project the stencil looks like a crime scene — that’s normal.

And then the peel. One minute you have a white blob. The next minute there’s a hen covered in flowers and feathers looking at you like she’s been there all along.
Step 5: Finish and seal
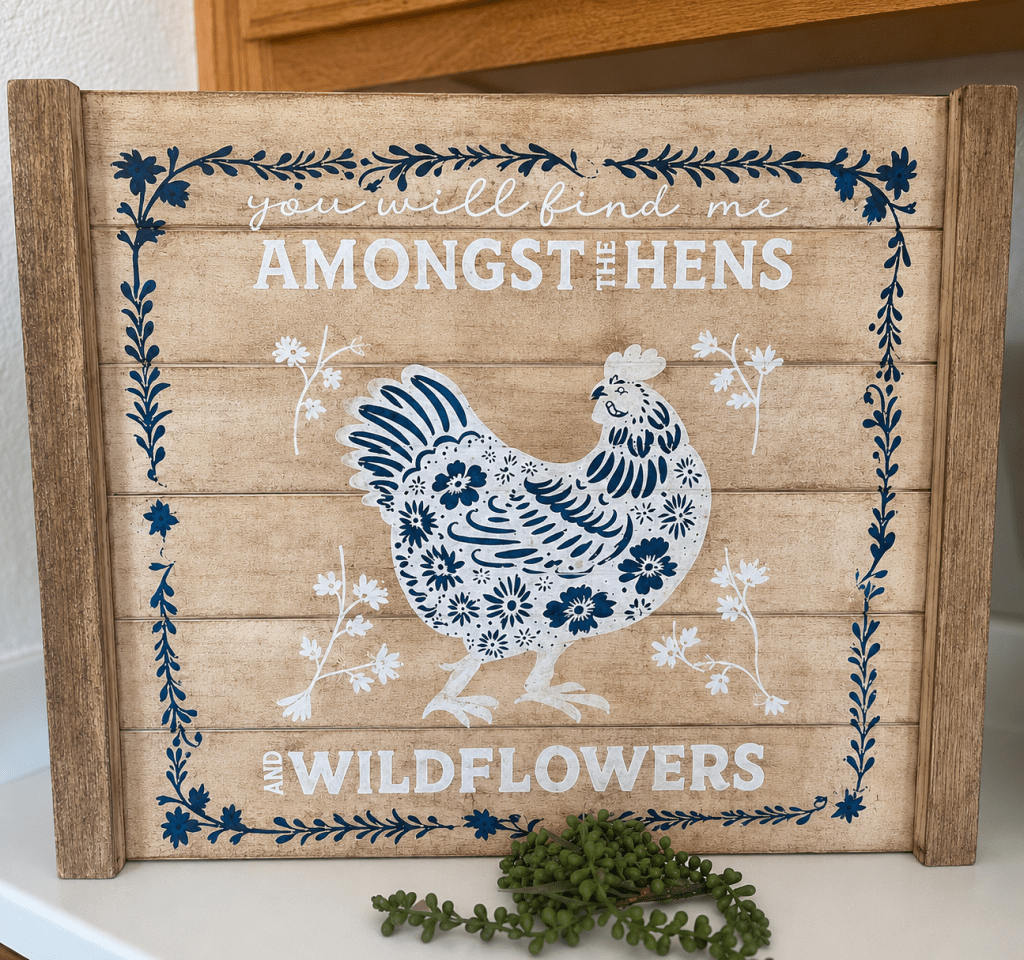
Rosa’s board got a lightly distressed finish that makes the whole thing look like it’s been hanging in a farmhouse kitchen for forty years, in the best way. If your sign is headed outdoors or into the coop, a coat of clear spray sealer will keep the damp off your hard work.

Go make one
A big thank-you to Rosa for letting me share her photos — it’s one thing to admire a finished sign, and another to see exactly how it comes together and realize you could absolutely do this on a Saturday afternoon.
Rosa used the same reusable AMONGST THE HENS AND WILDFLOWERS stencil from WallCutz that Bonnie used for my coop sign — it comes in four sizes and holds up to plenty of reuse, so fair warning: nobody stops at one.
If you make your own, I want to see it. The chickens won’t care. I will.
— Pearl


Leave a comment